If you’ve spent any time browsing modern websites recently, you’ve probably noticed a shift happening. More sites are becoming animated, interactive, and full of motion. Check out the work from Hardik Bashal.
Static layouts are slowly being replaced with immersive visuals, floating 3D objects, glowing backgrounds, and subtle hover effects that make websites feel far more alive.
The problem is that creating these kinds of experiences has traditionally been difficult. Most designers either needed advanced coding knowledge or had to rely on complicated software that came with a steep learning curve.
That’s where Unicorn Studio comes in.
What is Unicorn Studio?
Unicorn Studio is quickly becoming one of the most exciting tools for designers and creators who want to build visually impressive web experiences without spending months learning complex animation software.
It allows you to create motion-heavy scenes, interactive effects, and animated 3D visuals directly in your browser.
Why Unicorn Studio is Getting Popular?
What makes it especially appealing is how beginner-friendly it feels. Within minutes of opening the platform, you can already start building something that looks polished and modern.
It feels genuinely fun and easy to iterate rapidly on what was previously complex to do in Webgl and shaders.
Some of the features driving its popularity include:
- No-code motion design
- Interactive hover animations
- Easy exports to Webflow and Framer
- Beginner-friendly workflows
- Modern premium-looking visual effects
- Browser-based editing
- Remixable community projects
- Animated 3D scenes and backgrounds
What’s really exciting is that it’s becoming more like Rive and Figma with multi-scene launching recently.
How to use Unicorn Studio?
When you first log into Unicorn Studio, you’re greeted with a dashboard that feels surprisingly approachable.
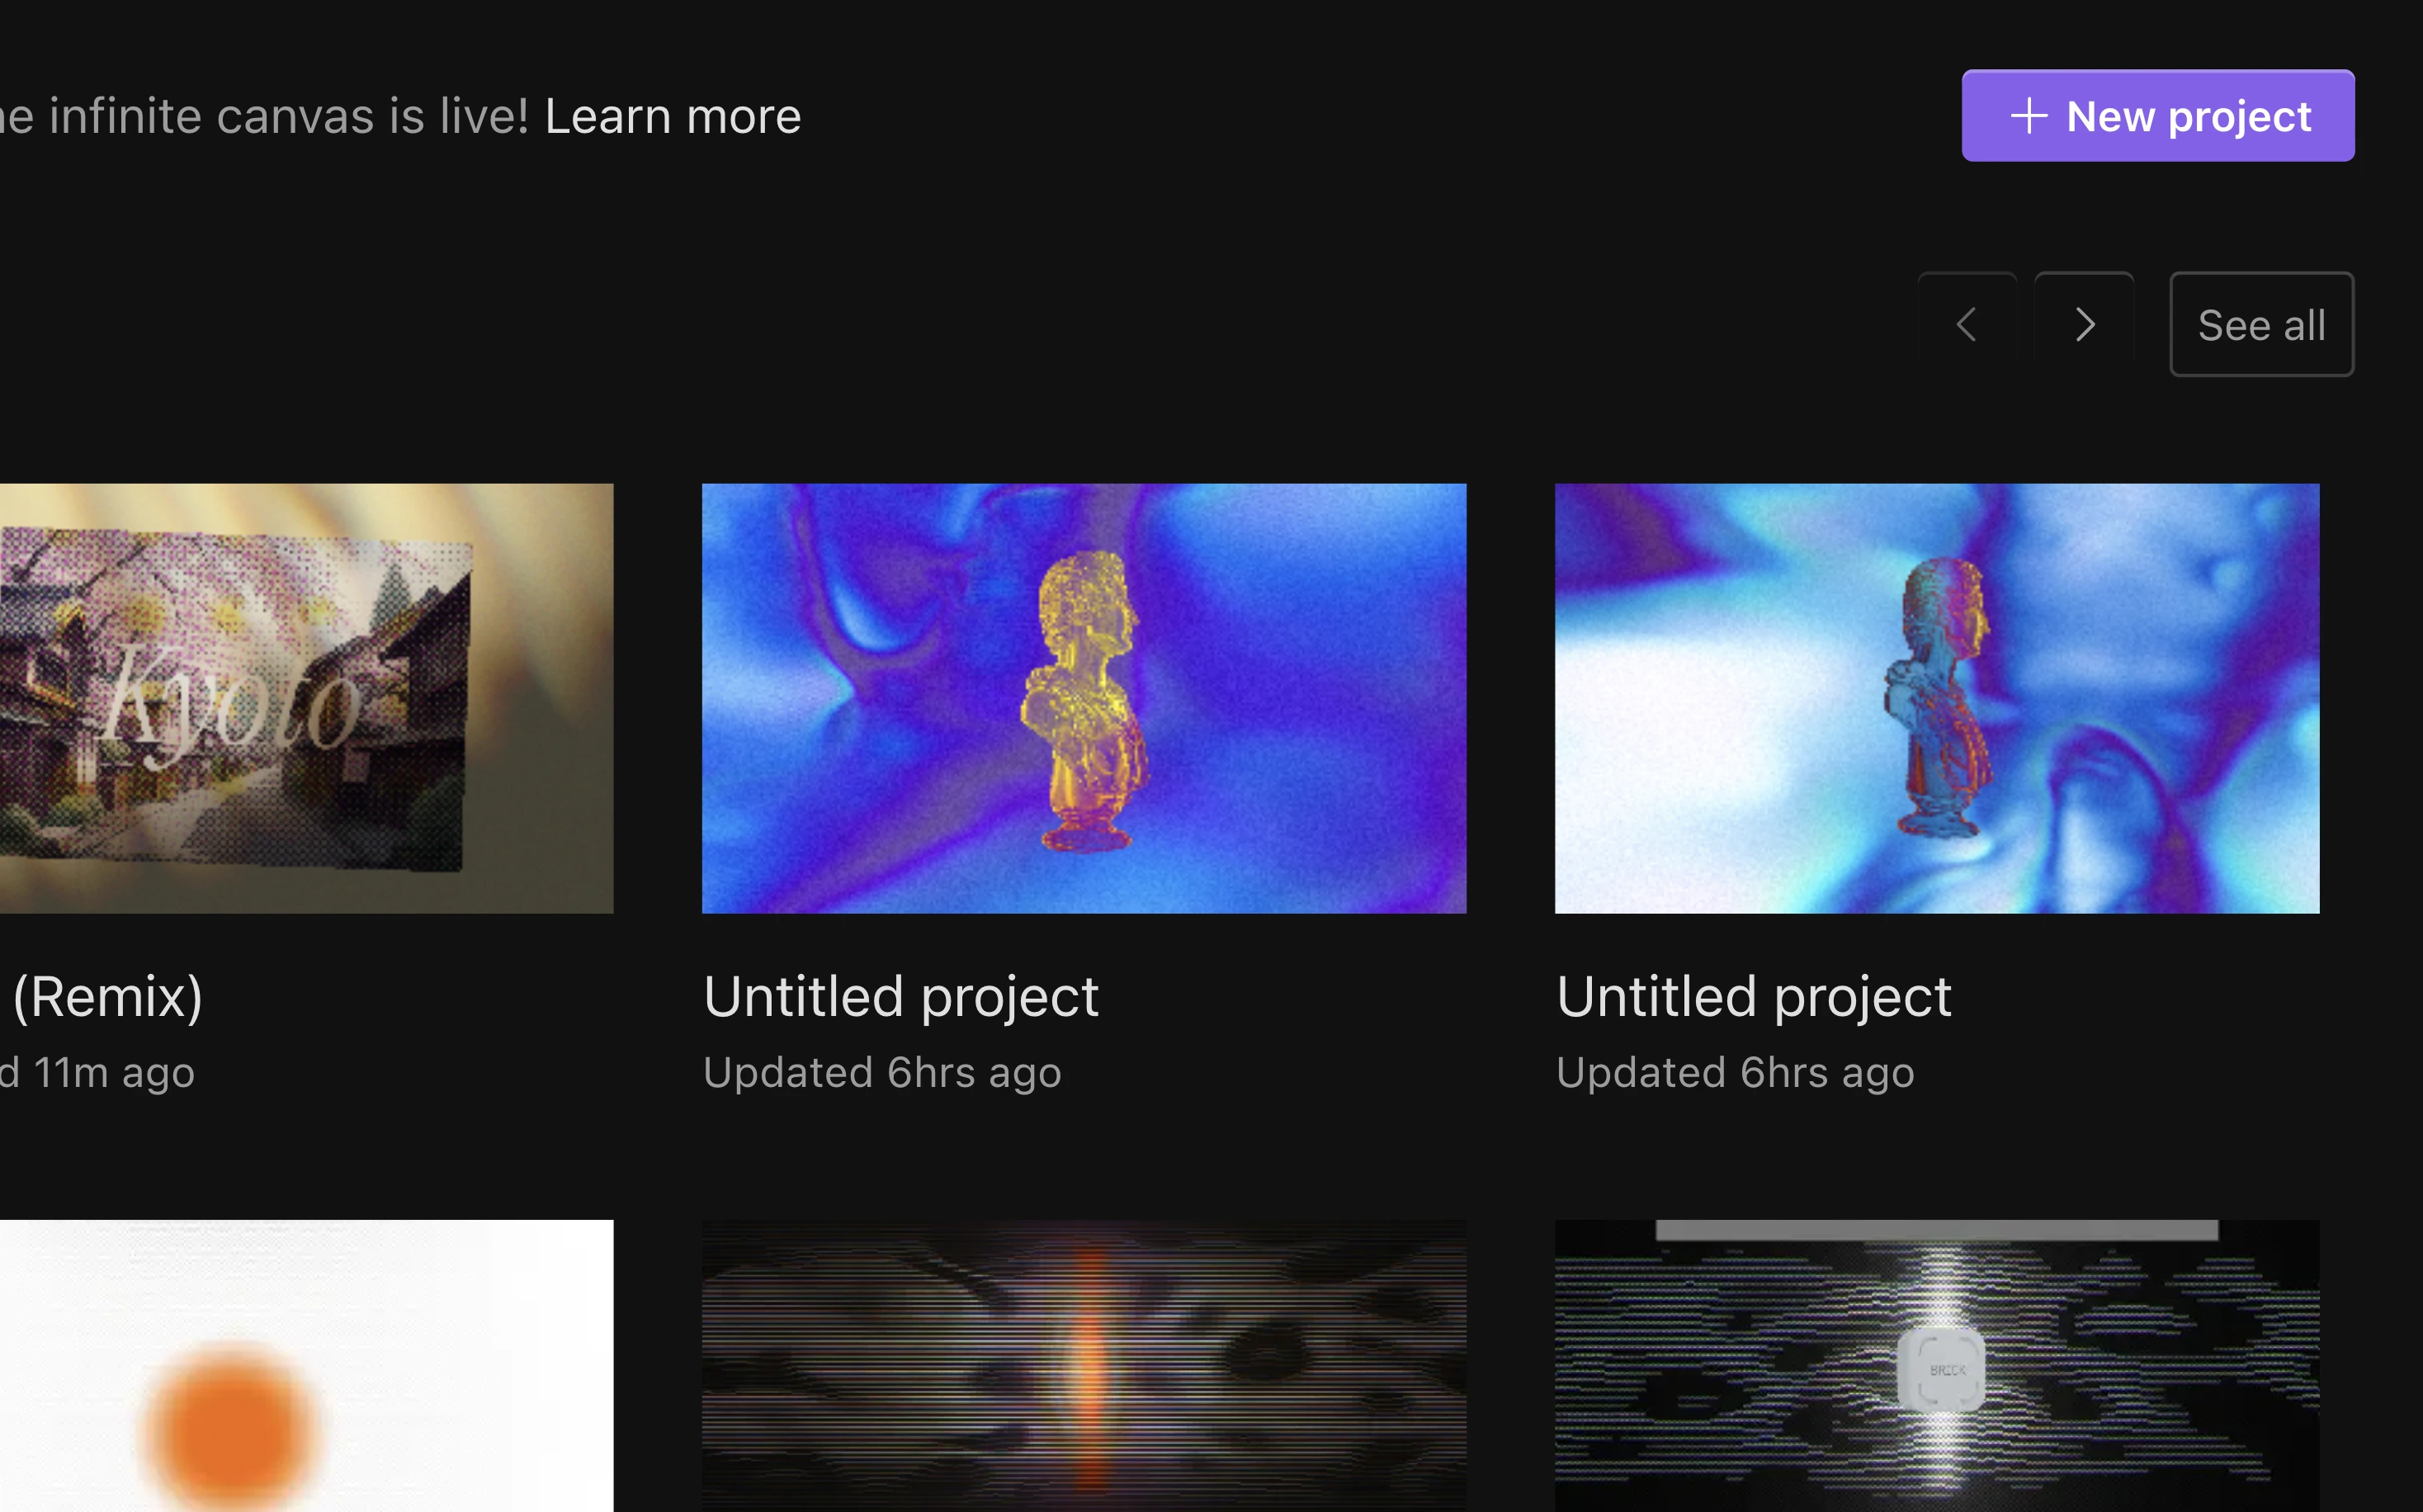
Remixing Community Projects
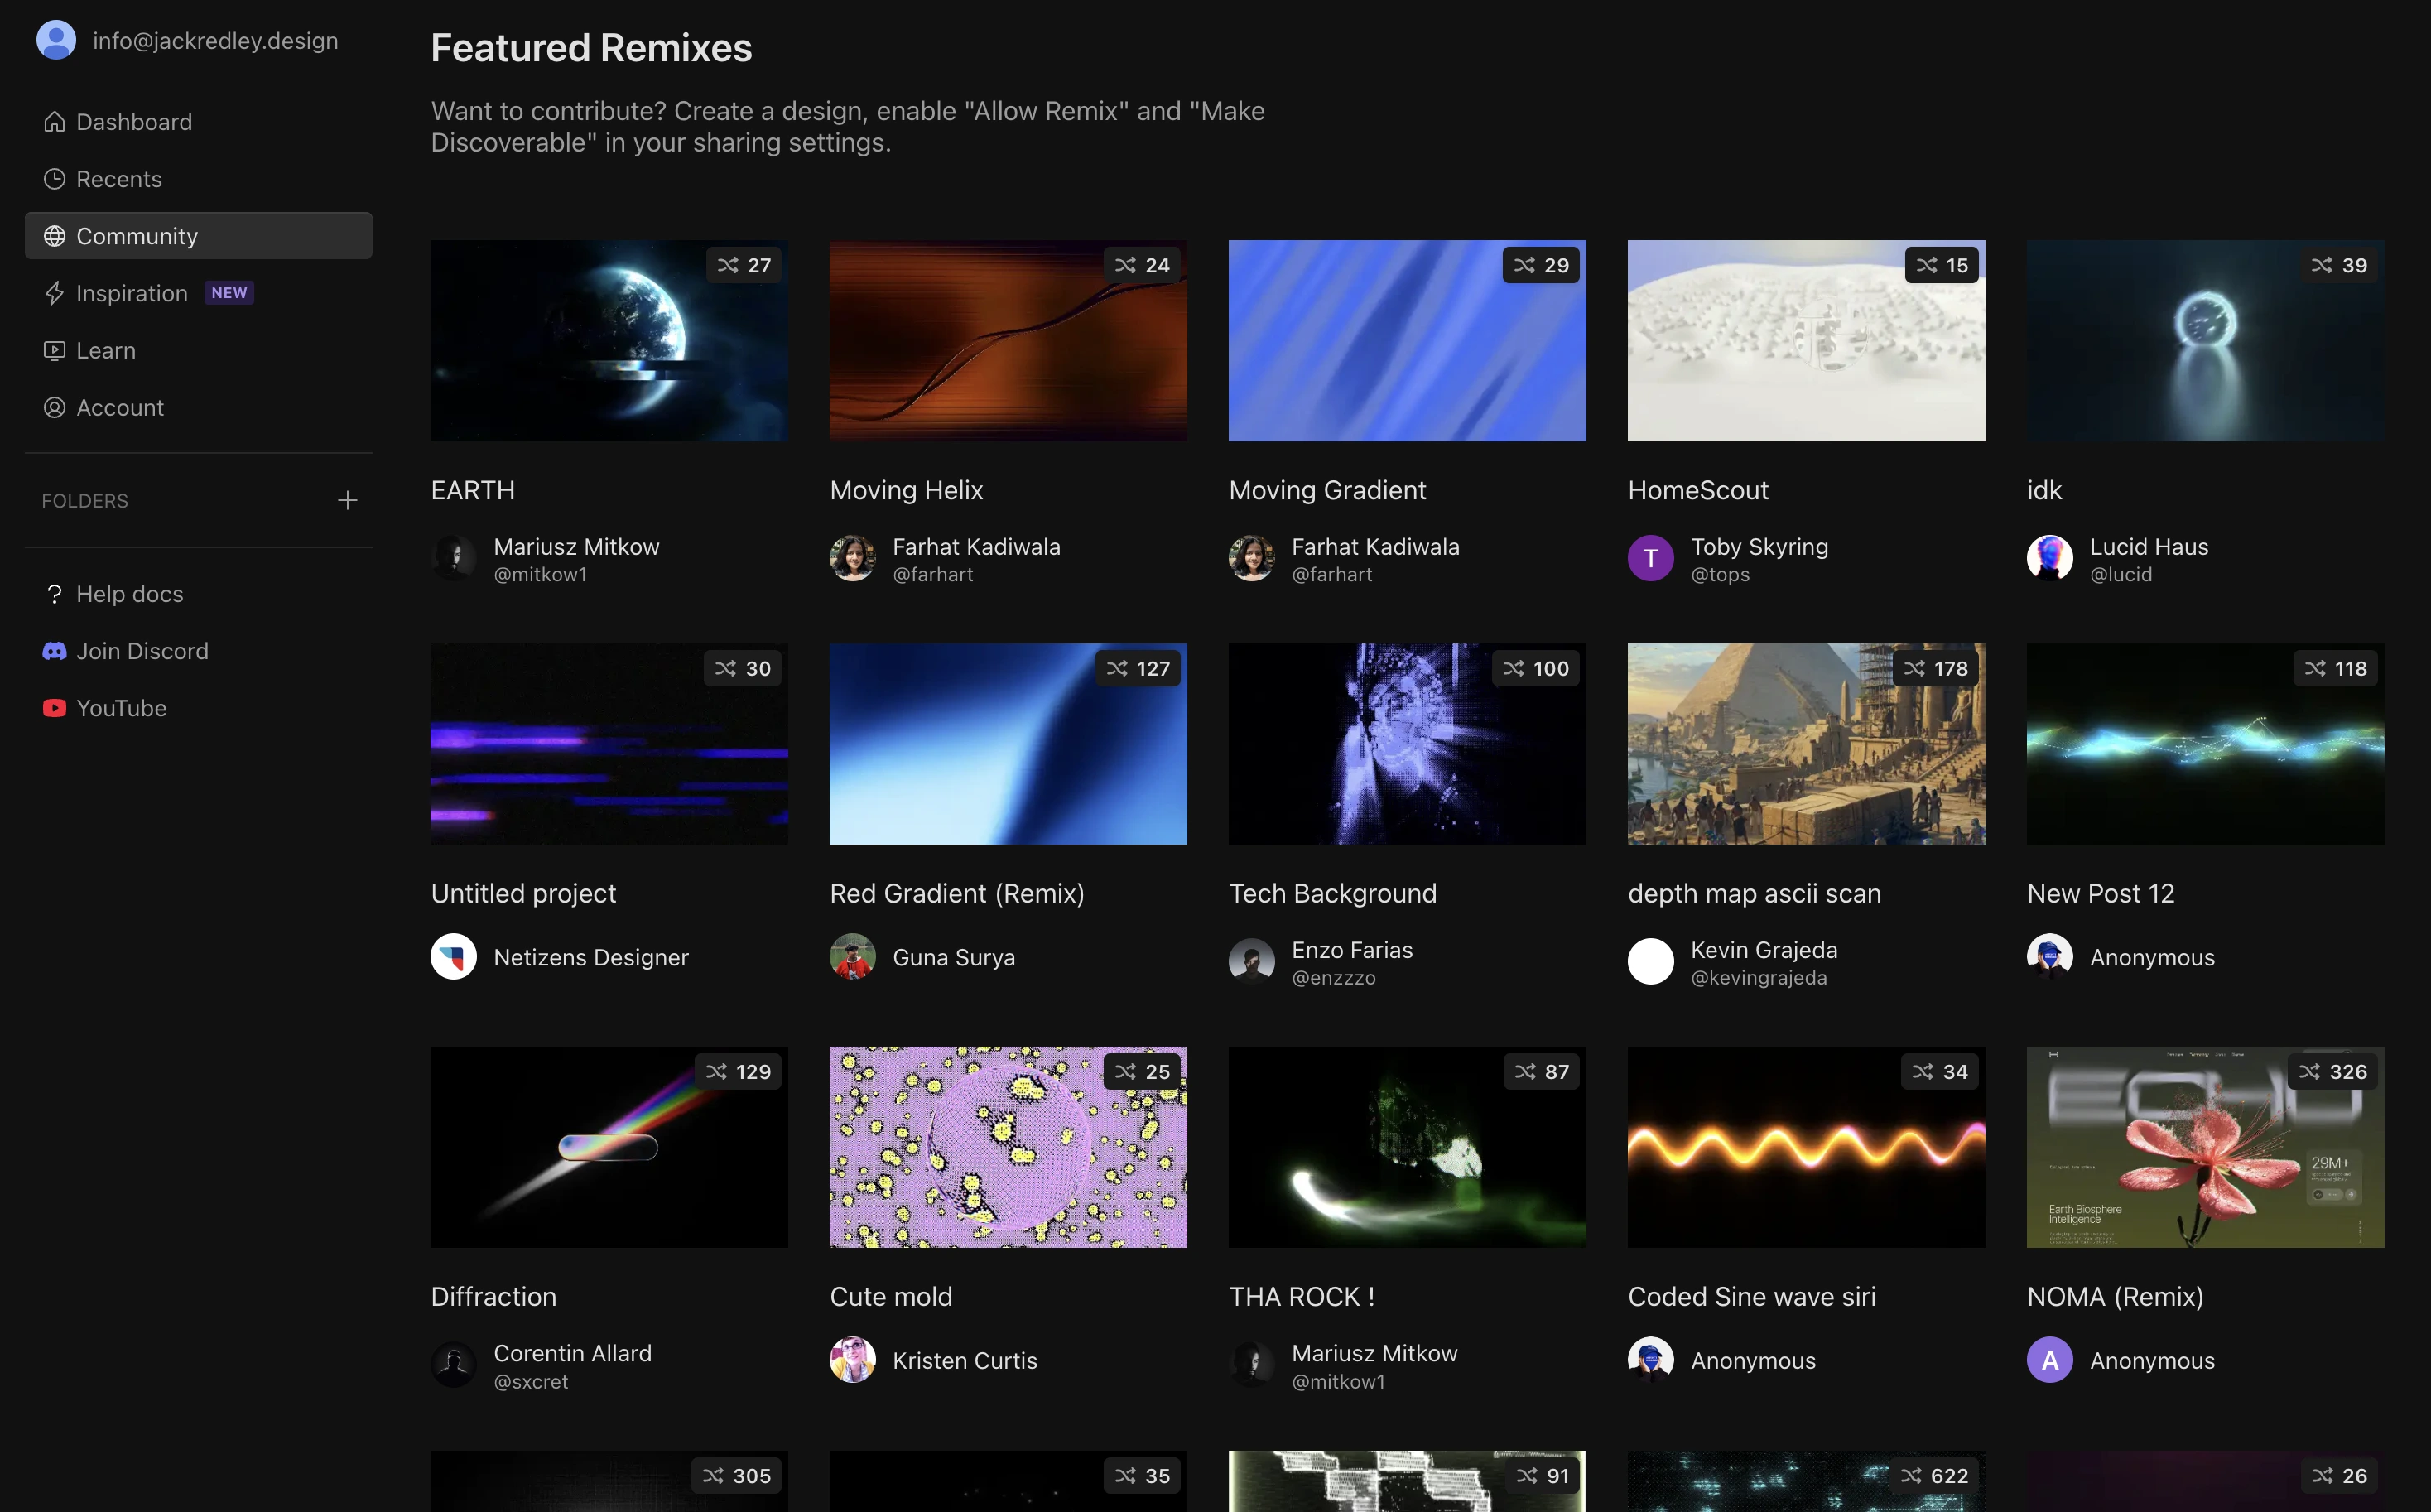
Instead of staring at a blank canvas with no direction, you immediately have access to community-made projects that you can remix and explore.

This feature alone makes learning the platform dramatically easier because you can study how other creators build their scenes and then tweak those projects yourself.
Some of the community creations are genuinely impressive. You’ll find floating 3D objects, abstract motion graphics, interactive hover animations, and cinematic backgrounds that look like they belong on expensive agency websites.

If you see something you like, you can simply click “Remix” and instantly pull the entire scene into your own workspace.
For beginners, this is probably the best way to learn the platform.
Instead of watching hours of tutorials before making anything, you can reverse-engineer existing projects and start experimenting immediately.
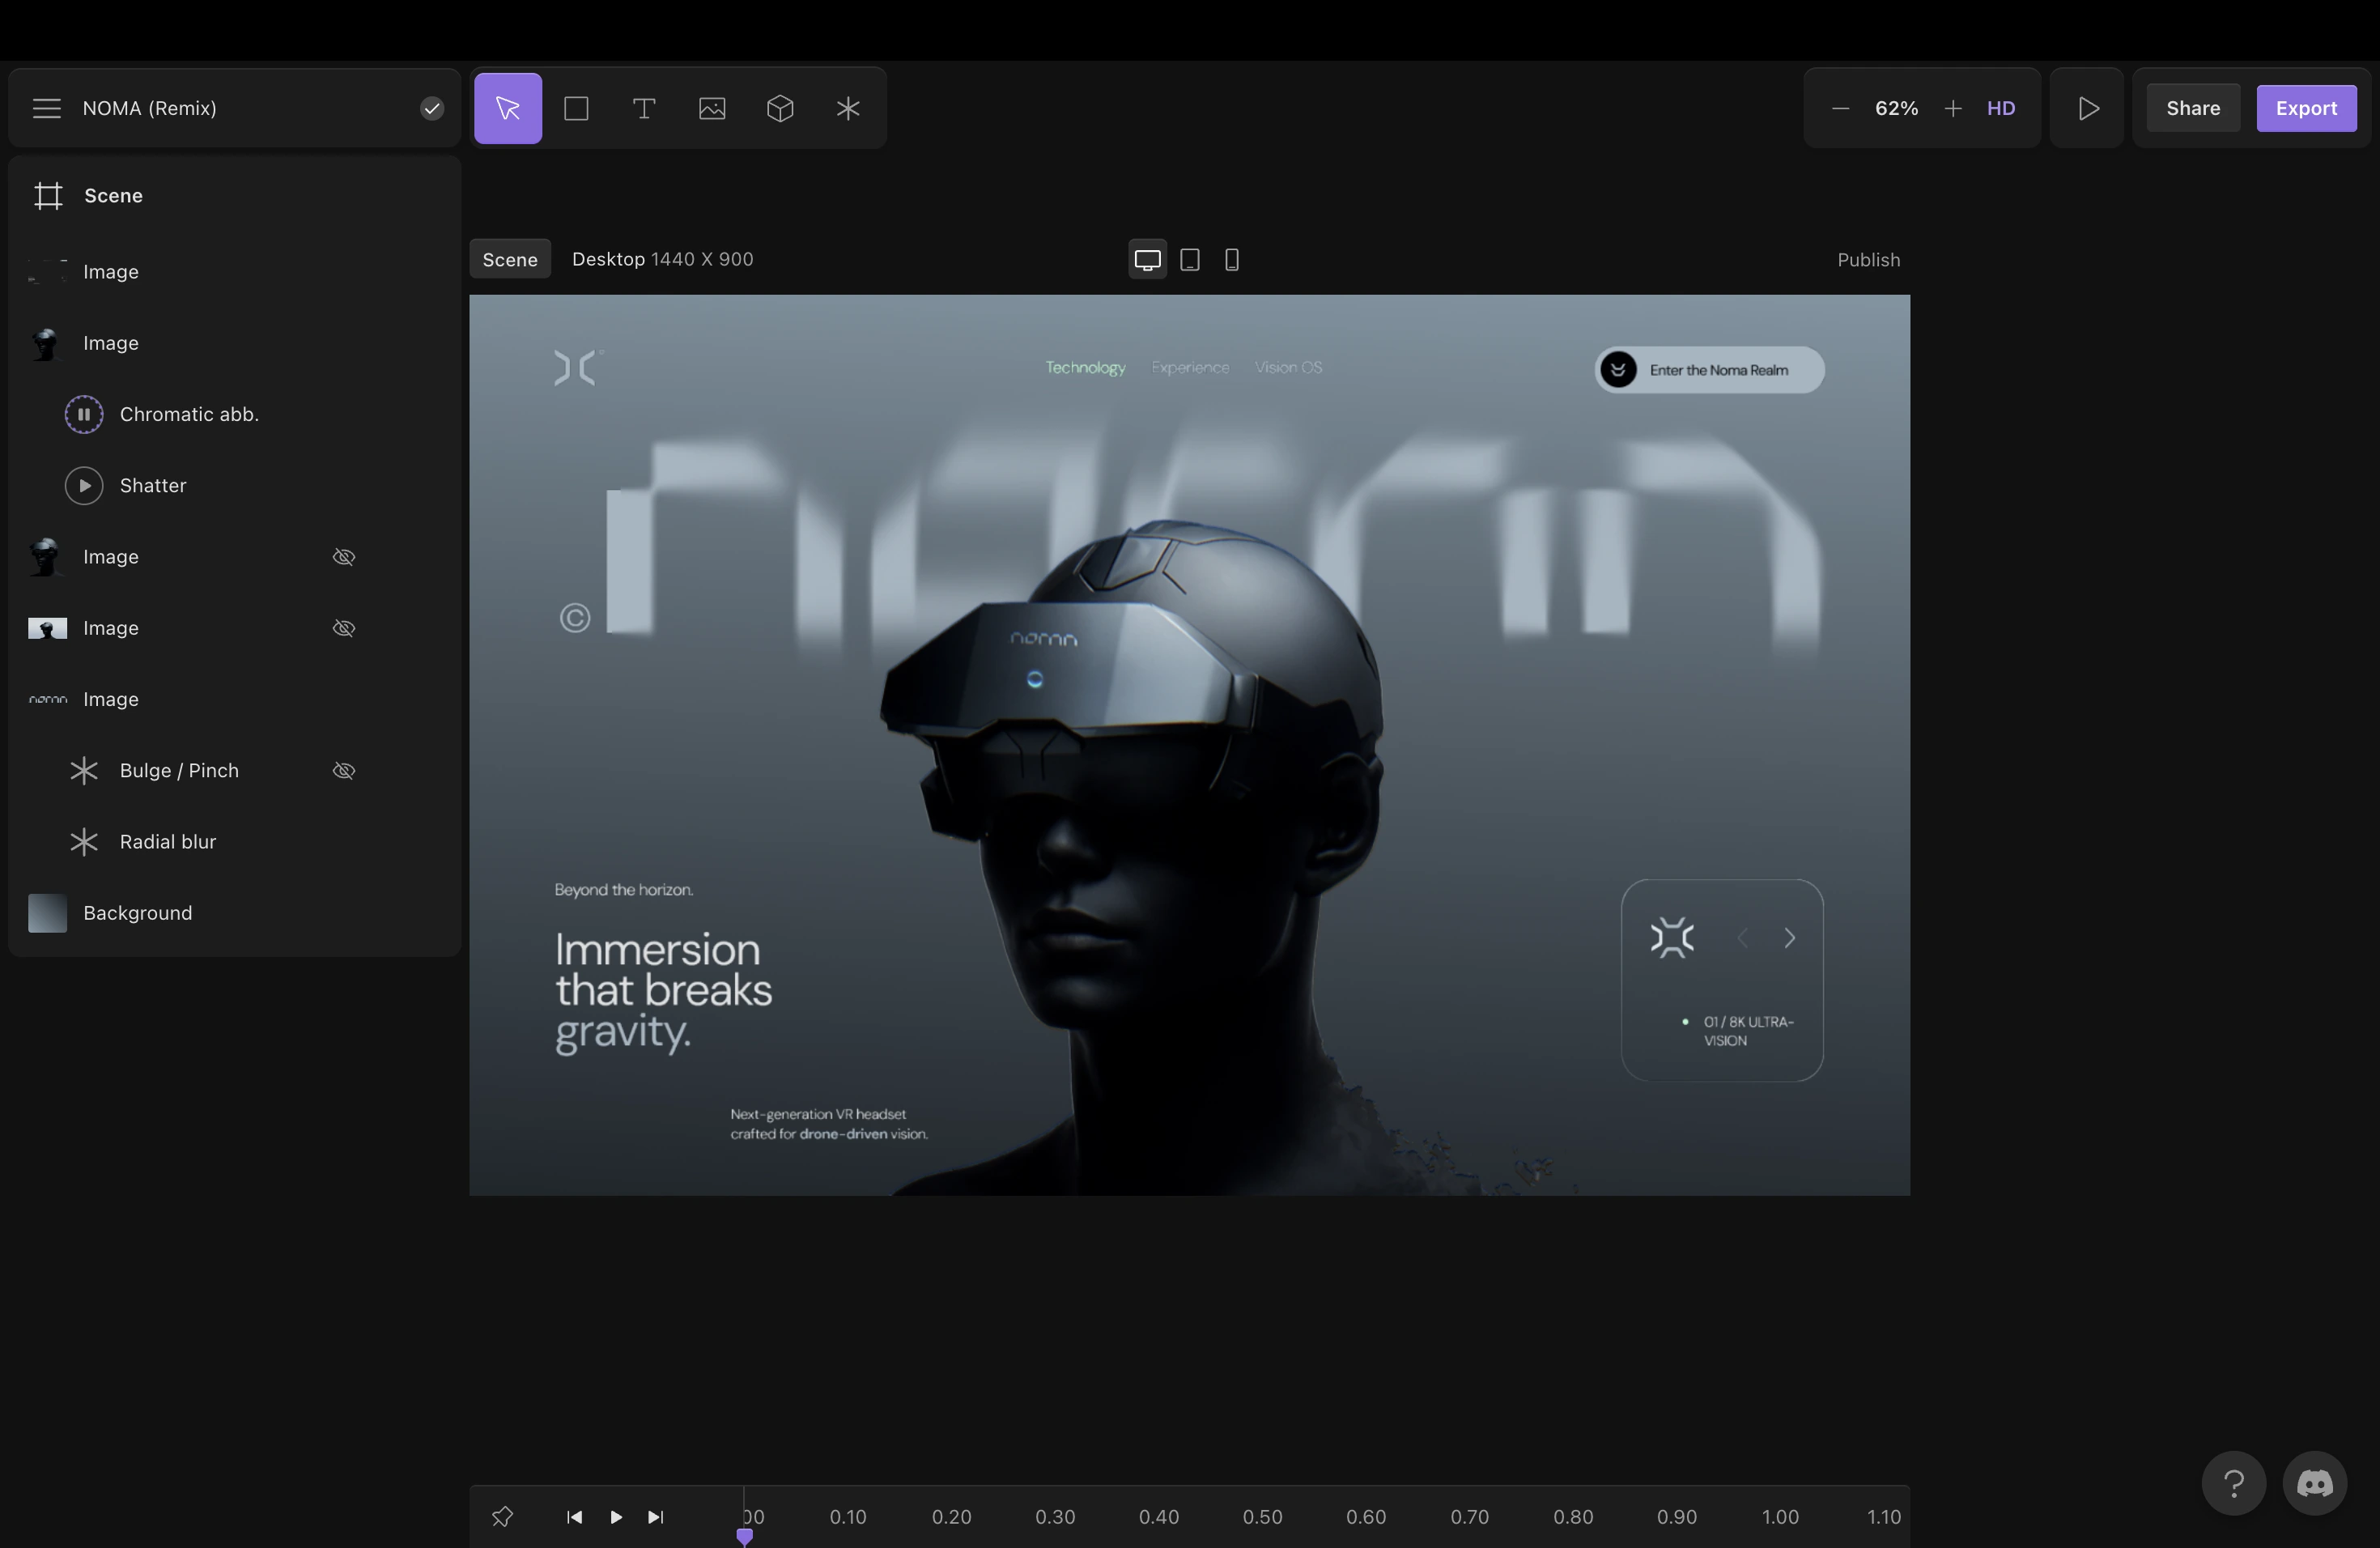
Creating Your First Scene
Creating a project from scratch is also refreshingly simple.
Once you click “New Project,” Unicorn Studio opens a large canvas where you can begin building your scene. The interface feels clean and modern, and most of the controls are fairly intuitive after a few minutes of exploring.
Click “new project” in the top right corner.
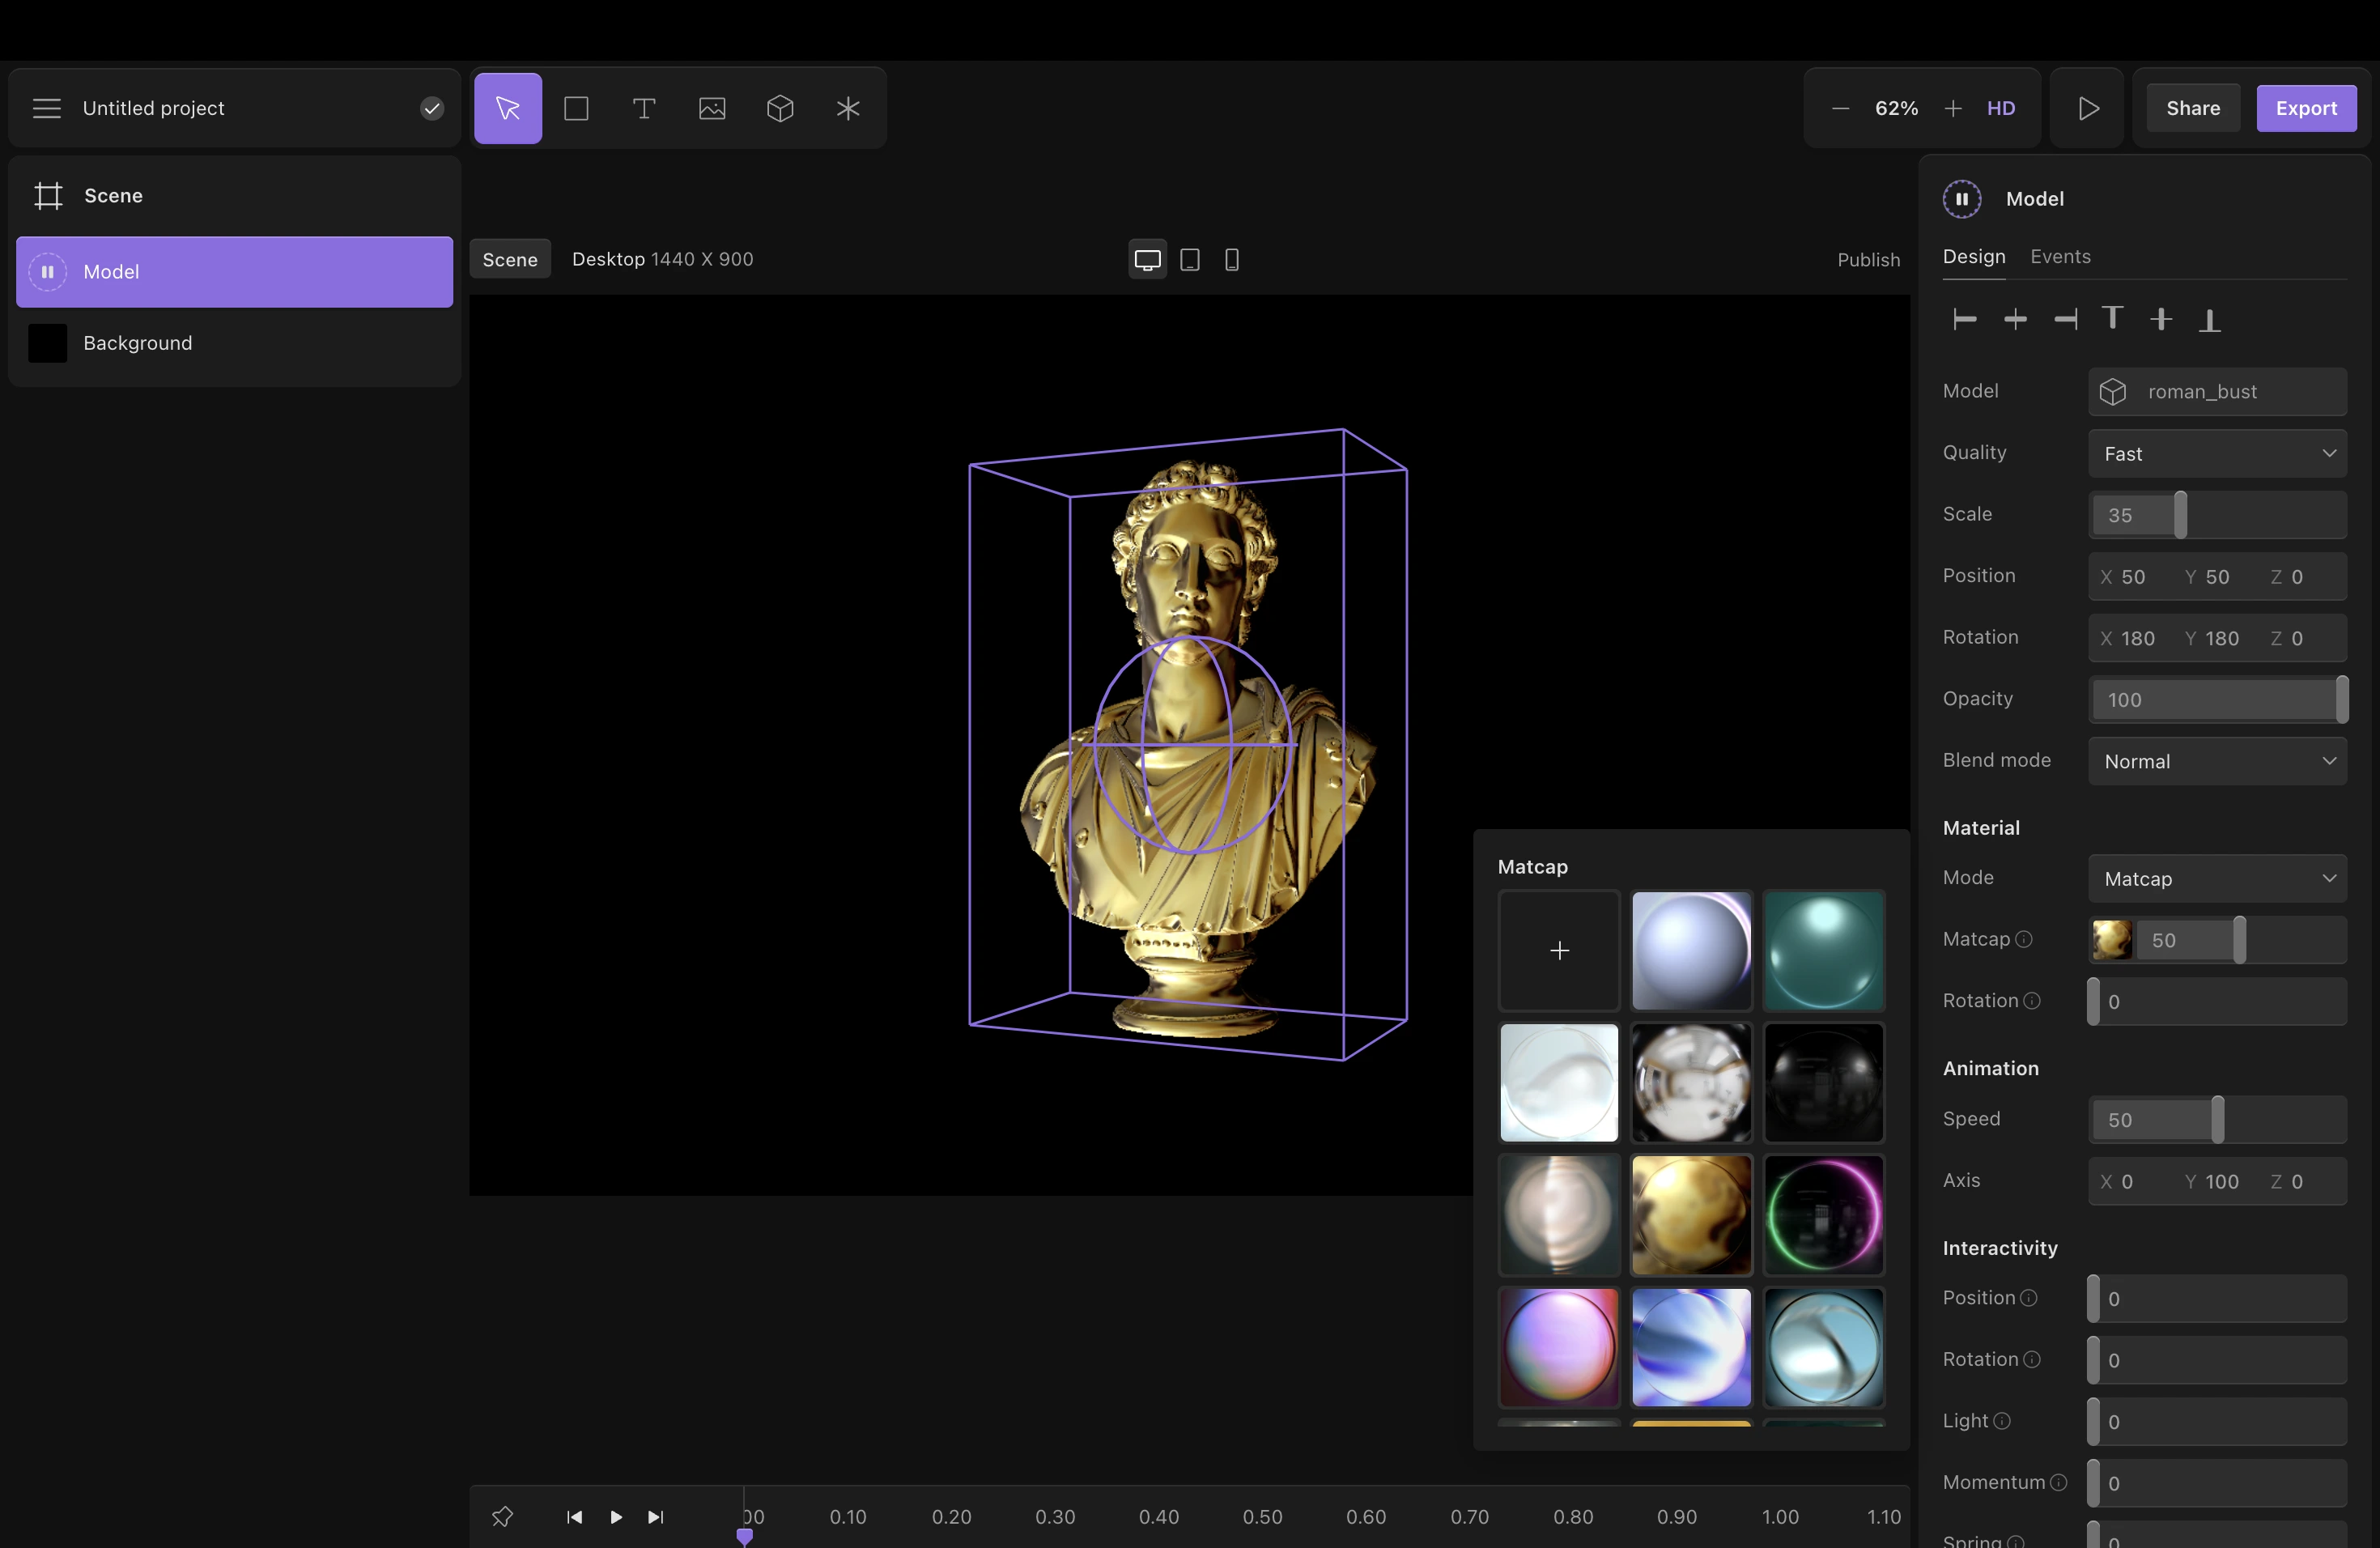
Adding 3D Objects
Unicorn Studio includes built-in shapes and models that instantly bring movement and personality to your design so you can click that or send it with your own design.

For example, one of my favourite default 3D object is a Roman busts or statue-style 3D models combined with glowing gradients and cinematic lighting. It sounds complicated, but it’s actually well easy.

After adding an object to the scene, you can adjust its material, lighting, colours, and animation speed.
Using MatCap Materials
There’s a feature called “MatCap” that lets you quickly apply different surface styles to your object, including metallic silver and gold finishes that instantly make the design feel more polished.
What’s interesting about Unicorn Studio is how visual the entire process feels. You don’t need to think like a developer. You simply click on elements, adjust sliders, test animations, and experiment with effects until the scene starts to feel right.
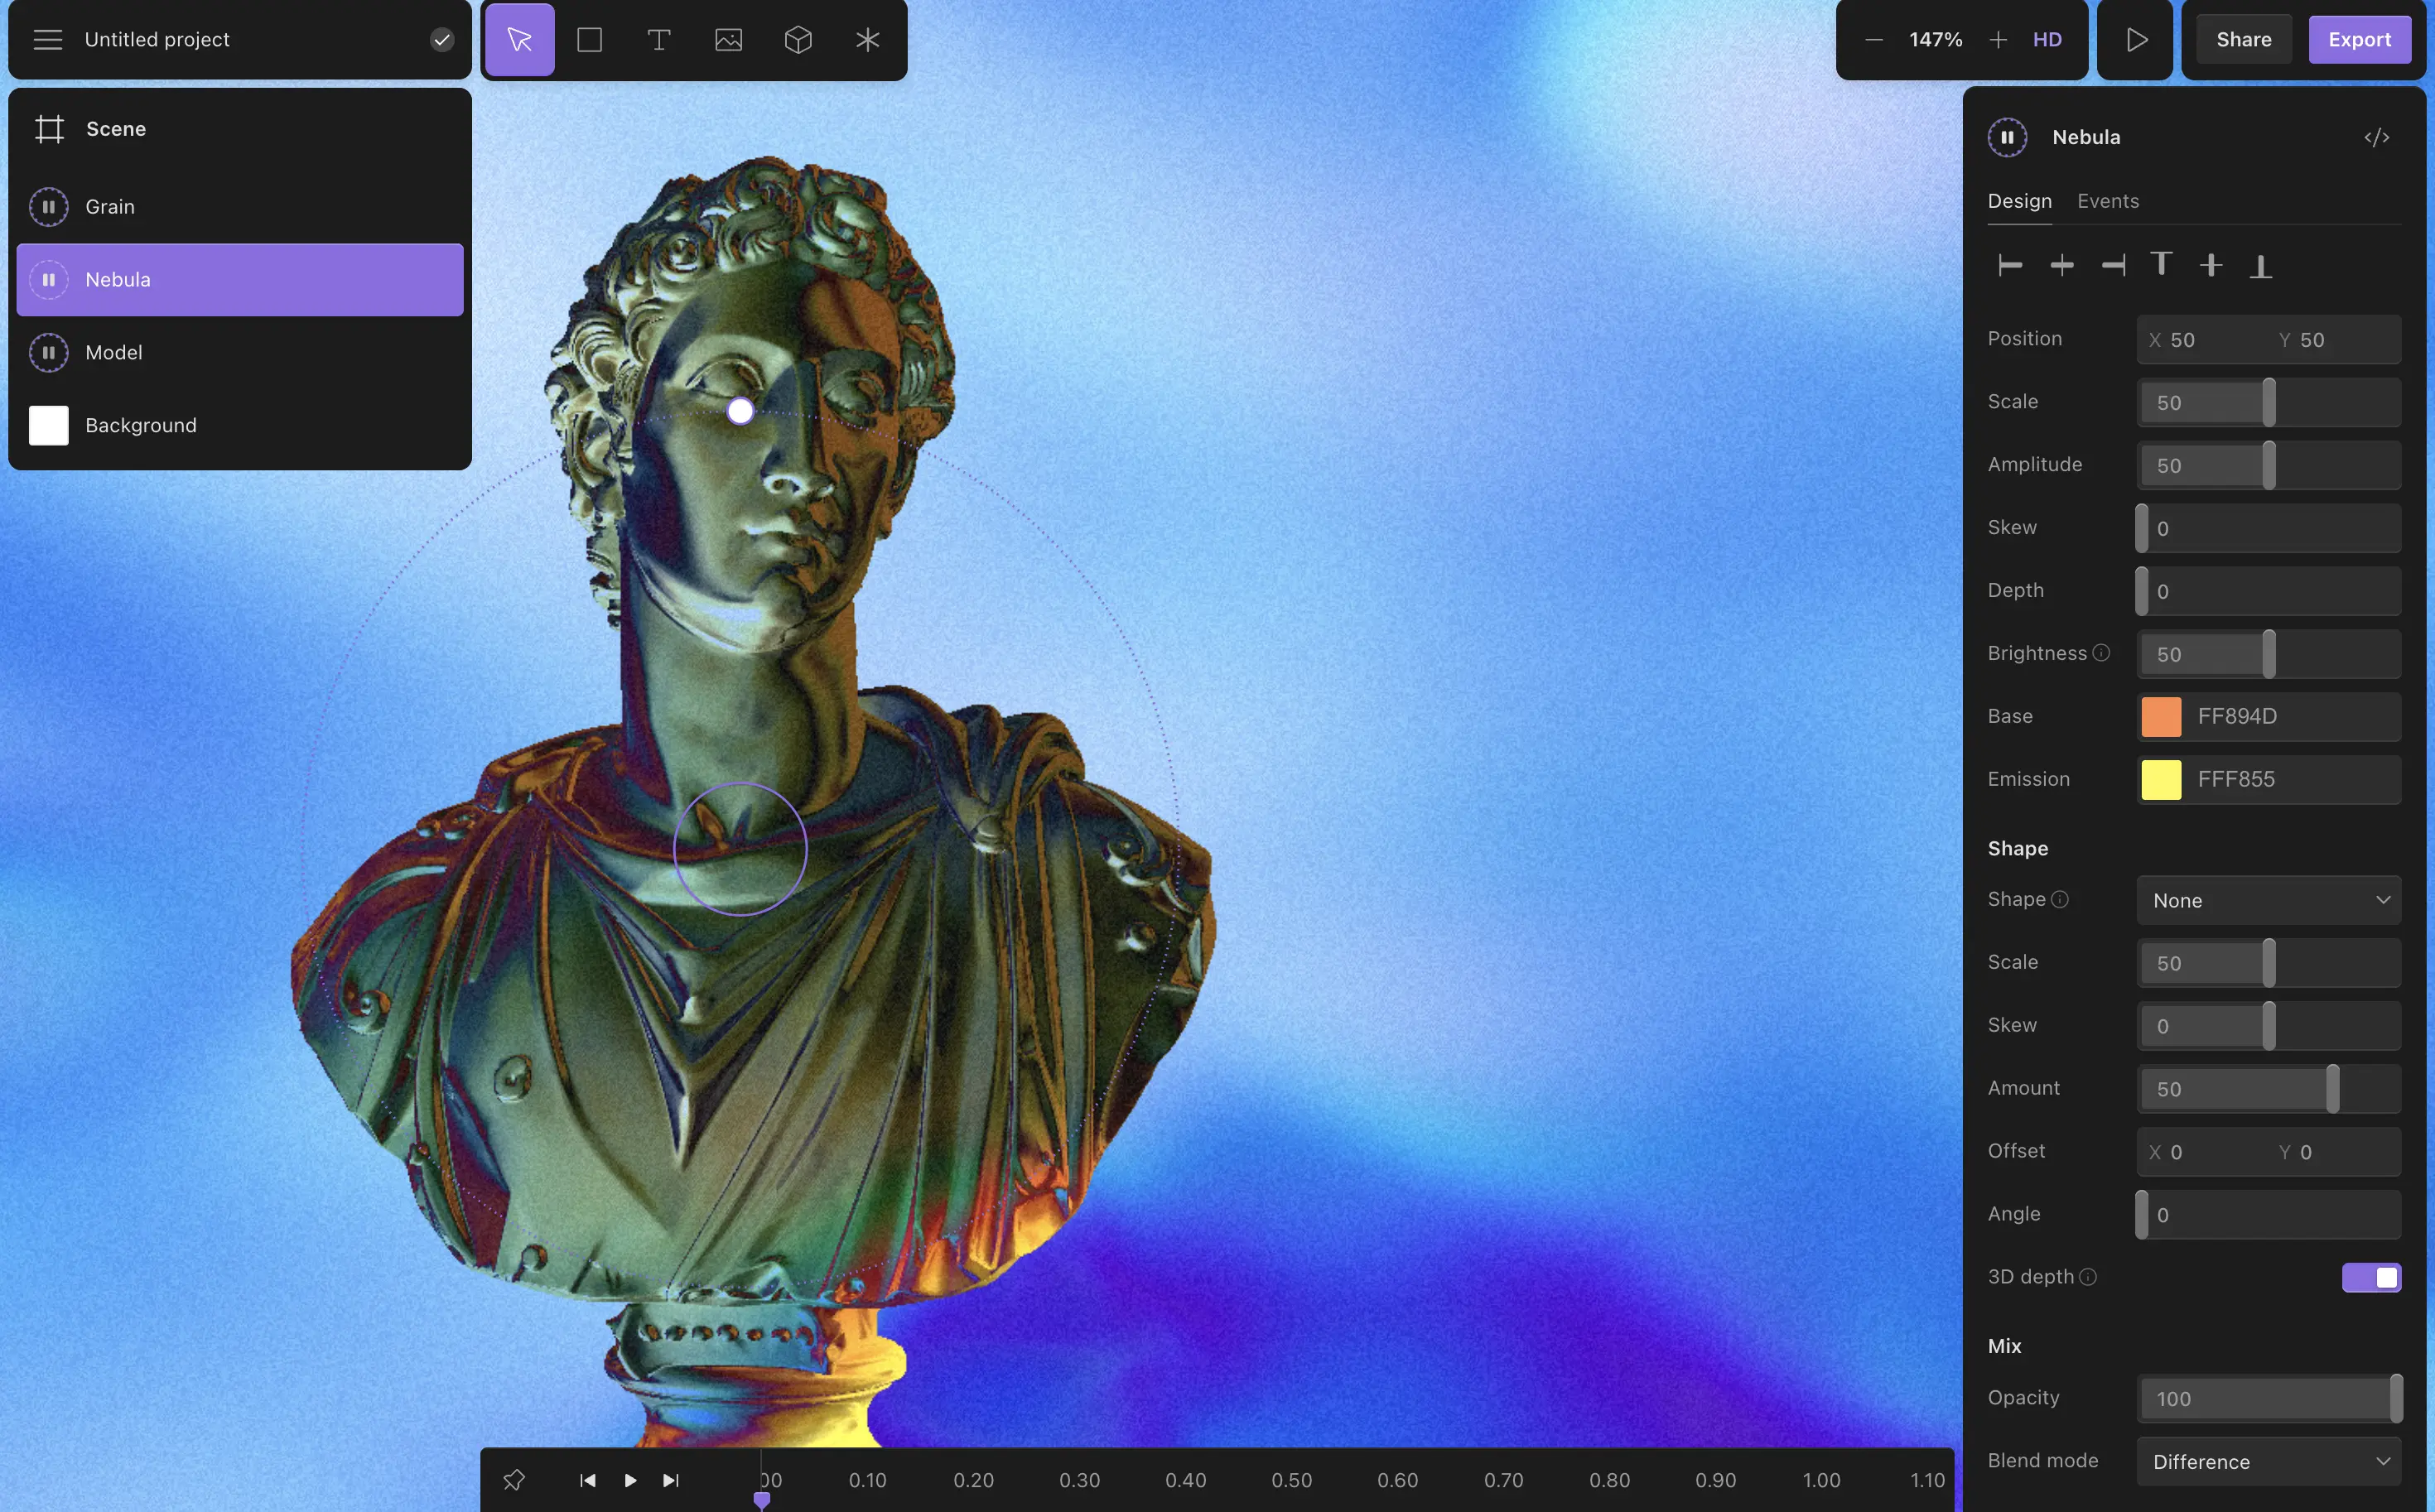
The background effects are where things start getting especially fun.
Creating Animated Backgrounds
Unicorn Studio includes animated visual layers like nebulas, gradients, grain textures, and lighting effects that can completely transform the mood of your design. You can stack these layers together much like you would in Photoshop, adjusting blend modes and opacity settings to create entirely different visual styles.

Using Blend Modes and Grain Effects
Even small adjustments can have a huge impact. A subtle grain layer, for example, can make a design feel more cinematic and less digitally perfect. Soft animated lighting can create depth, while blend modes allow colours to interact in unexpected ways.
The platform encourages experimentation, which is honestly one of its biggest strengths.
You can very quickly go from a plain scene to something that feels artistic and high-end just by playing around with a few settings.
But the real magic of Unicorn Studio is the interactivity.
Adding Interactivity and Hover Effects
Instead of creating animations that simply play in the background, you can make objects respond to user behaviour. Hover effects are especially easy to set up. With just a few clicks, you can make an object grow slightly larger when someone moves their cursor over it, creating a more tactile and responsive experience.
These kinds of subtle interactions are what separate modern premium websites from generic templates. They make a website feel alive.
Exporting Unicorn Studio to Webflow and Framer
What’s even better is that Unicorn Studio isn’t locked into its own ecosystem. Once your scene is finished, you can export it and embed it into platforms like Webflow, Framer, or virtually any modern website builder.

That means you can use Unicorn Studio to create interactive hero sections, animated landing pages, portfolio visuals, or social media content without needing to rebuild everything from scratch elsewhere.
Performance has also clearly been considered. During export, Unicorn Studio includes options like “Flatten Changes,” which helps optimise file sizes and improve loading speed. This is important because motion-heavy websites can quickly become sluggish if they aren’t properly optimised.
Is Unicorn Studio Good for Beginners?
Overall, Unicorn Studio feels like one of those tools that lowers the barrier to creating genuinely impressive web experiences. A few years ago, building animated interactive websites like this would have required a combination of advanced development skills, motion design knowledge, and expensive software.
Now, beginners can experiment with these ideas in minutes.
That’s probably why the platform is growing so quickly among designers, creators, and no-code developers. It gives people the ability to create websites that feel modern and visually exciting without needing a huge technical background.
If you’ve been wanting to make your websites feel more interactive, cinematic, or simply less generic, Unicorn Studio is absolutely worth exploring. Even spending half an hour inside the platform is enough to see why so many designers are excited about it right now.
Can You Use Unicorn Studio Without Coding?
Yeah, honestly that’s one of the biggest reasons people are getting excited about it right now.
You really don’t need to know how to code to make something that looks genuinely impressive inside Unicorn Studio. Most of the workflow is visual. You’re clicking objects, adjusting sliders, tweaking effects, adding interactions, and layering visuals together until the scene feels right.
That’s what makes it feel approachable compared to traditional motion design tools or custom WebGL development.
Obviously, if you do know code, you can push things much further, but for most people, especially designers, creators, and no-code builders, you can get surprisingly far without touching a single line of code.
That’s kind of the magic of it.
Best Features in Unicorn Studio
The biggest feature for me is definitely the interactivity.
Being able to create hover effects, motion, and responsive animations without setting up loads of complicated logic is massive. It makes websites feel way more alive without needing an entire front-end development workflow.
The community remix feature is also incredibly underrated. You can literally open someone else’s project, see how they built it, and then experiment yourself. That makes learning way faster.
Some other standout features:
- Built-in 3D objects and scenes
- Animated backgrounds and nebulas
- Blend modes and grain effects
- MatCap materials for quick styling
- Easy exports for Webflow and Framer
- Multi-scene workflows
- Browser-based editing
It just removes loads of friction from the creative process.
How to Create Interactive Websites Without Code
The easiest way right now is honestly using visual tools like Unicorn Studio alongside platforms like Webflow or Framer.
Instead of manually coding animations and interactions, you can visually build scenes, add motion effects, and create hover interactions directly inside the editor.
A simple workflow could look like this:
- Build your scene in Unicorn Studio
- Add animations and hover effects
- Export the project
- Embed it into Webflow or Framer
That alone can make a landing page feel dramatically more premium and modern.
The cool thing is you don’t need to overdo it either. Even subtle movement, soft lighting, or a small interactive hover effect can completely change how professional a website feels.
Unicorn Studio vs Spline
They’re actually pretty different tools even though people compare them a lot.
Spline feels more focused on 3D scene creation and modelling, whereas Unicorn Studio feels more focused on interactive website experiences and motion-heavy visuals.
If interested in creating a scroll experience with a 3D object, check out this article here: How To Create a 3D Website Using Spline & Webflow
If interested in starting out building in Spline, check out my article here all about learning Spline: How to learn 3D using Spline Tool: 3 Step Roadmap
Spline gives you a bit more control over complex 3D environments, but Unicorn Studio feels faster and more design-oriented for creating modern landing pages and web sections.
Personally, Unicorn Studio feels easier to jump into as a beginner.
It reminds me a bit more of working in Figma or Rive, whereas Spline can sometimes feel slightly more technical depending on what you’re building.
If your goal is:
- Cinematic hero sections,
- Motion-heavy web design,
- Interactive landing pages,
- Premium-looking visuals,
Then Unicorn Studio honestly feels incredibly good for that.
Is Unicorn Studio Worth It?
Absolutely in my opinion.
Yes, it's another subscription to your ever-growing subscription list (at $14 a month).
But, if you care about making websites feel more modern and interactive, there is no easier tool.
A few years ago, creating this kind of motion-heavy experience would’ve required a combination of:
- front-end development,
- animation skills,
- WebGL knowledge,
- and expensive software.
Now you can realistically make something visually impressive in under an hour.
That’s why it’s getting so popular with:
- designers,
- no-code creators,
- freelancers,
- agencies,
- and content creators.
The learning curve is also much lower than people expect.
You can literally open the platform, remix a project, tweak a few effects, and already have something that looks polished.
How Much Does Unicorn Studio Cost?

Unicorn Studio has a free plan, which is honestly enough to start experimenting and learning the platform properly.
After that, they’ve got paid plans depending on:
- how many projects you want,
- export limitations,
- custom domains,
- collaboration,
- and higher-end features.
The pricing changes fairly regularly, so it’s probably best to check the official site for the latest plans.
But compared to hiring a developer or learning an entire animation stack from scratch, it’s honestly pretty accessible for what it does.
%20(1).jpg)