This project pushed me further than anything I’d worked on before. Not because of a single complex technique, but because so many small decisions stacked up over time. As the model grew, it became clear that success wasn’t about knowing more tools — it was about keeping the process under control.
These are the ten lessons that made the biggest difference, especially if you’re early in your 3D journey and want to build things that scale without becoming overwhelming.
1. Lock the Image on the Canvas
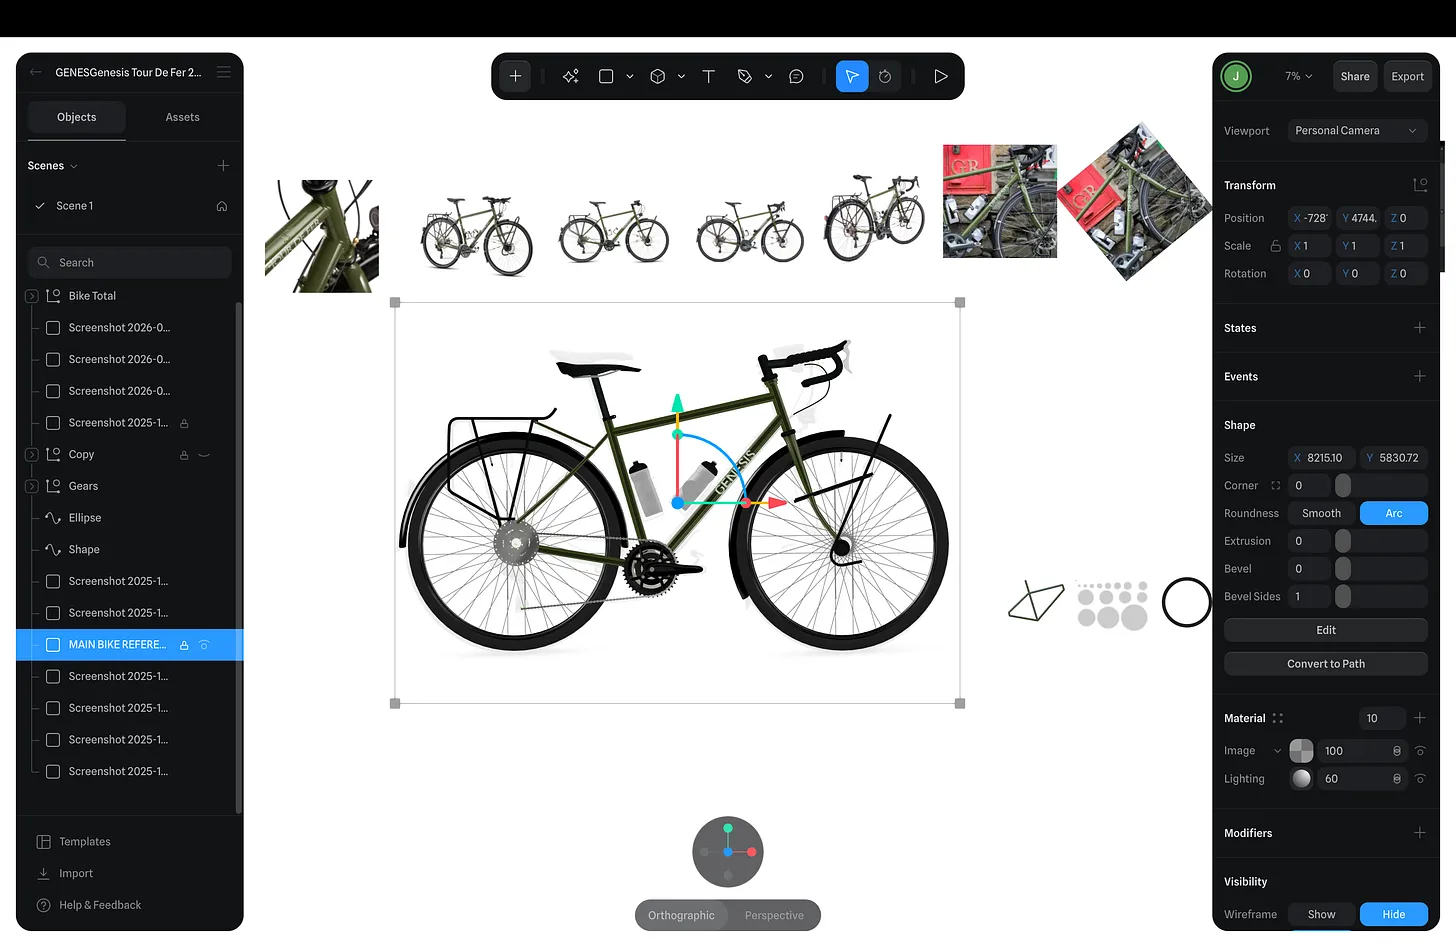
This is the first thing I do now, without exception. Reference images are there to ground proportions and layout, but they’re also incredibly easy to accidentally move. Once that happens, you start compensating without realising, and errors creep in everywhere.
Locking the image removes ambiguity. It turns the reference into a fixed point, which makes every modelling decision more confident and deliberate.
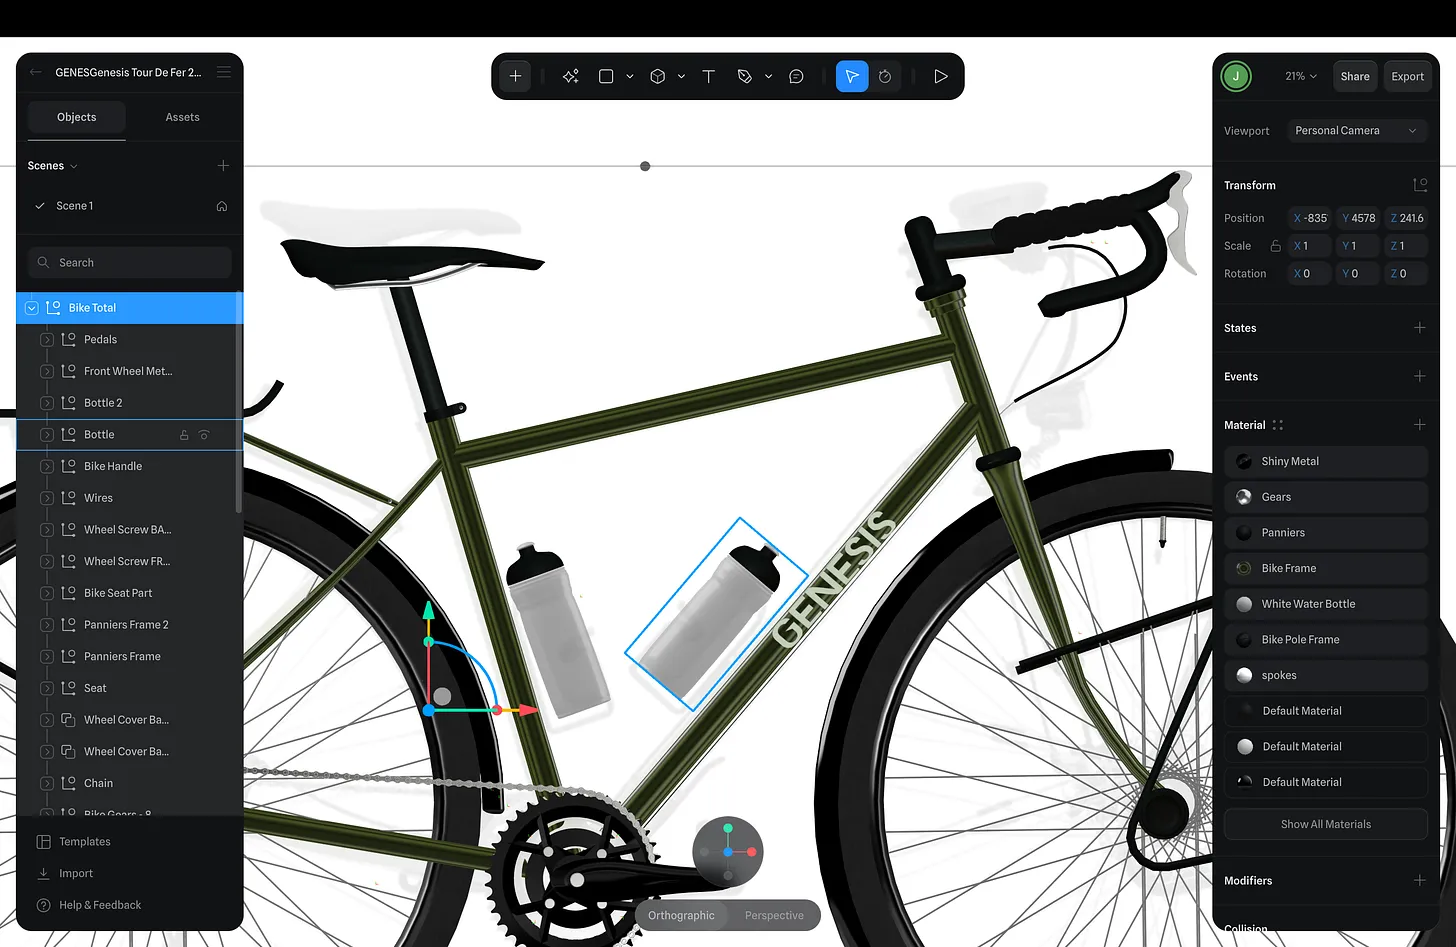
2. Label Everything Early
Unlabelled objects are fine for about ten minutes. After that, they slow everything down.
Naming objects and groups early meant I could quickly isolate parts, understand relationships, and come back to the project without mentally reconstructing what everything was. This becomes critical once you’re working with repeated elements, nested groups, or variations of the same shape.
Organisation isn’t busywork — it’s part of the design.
3. Export SVGs from Figma and Extrude Them
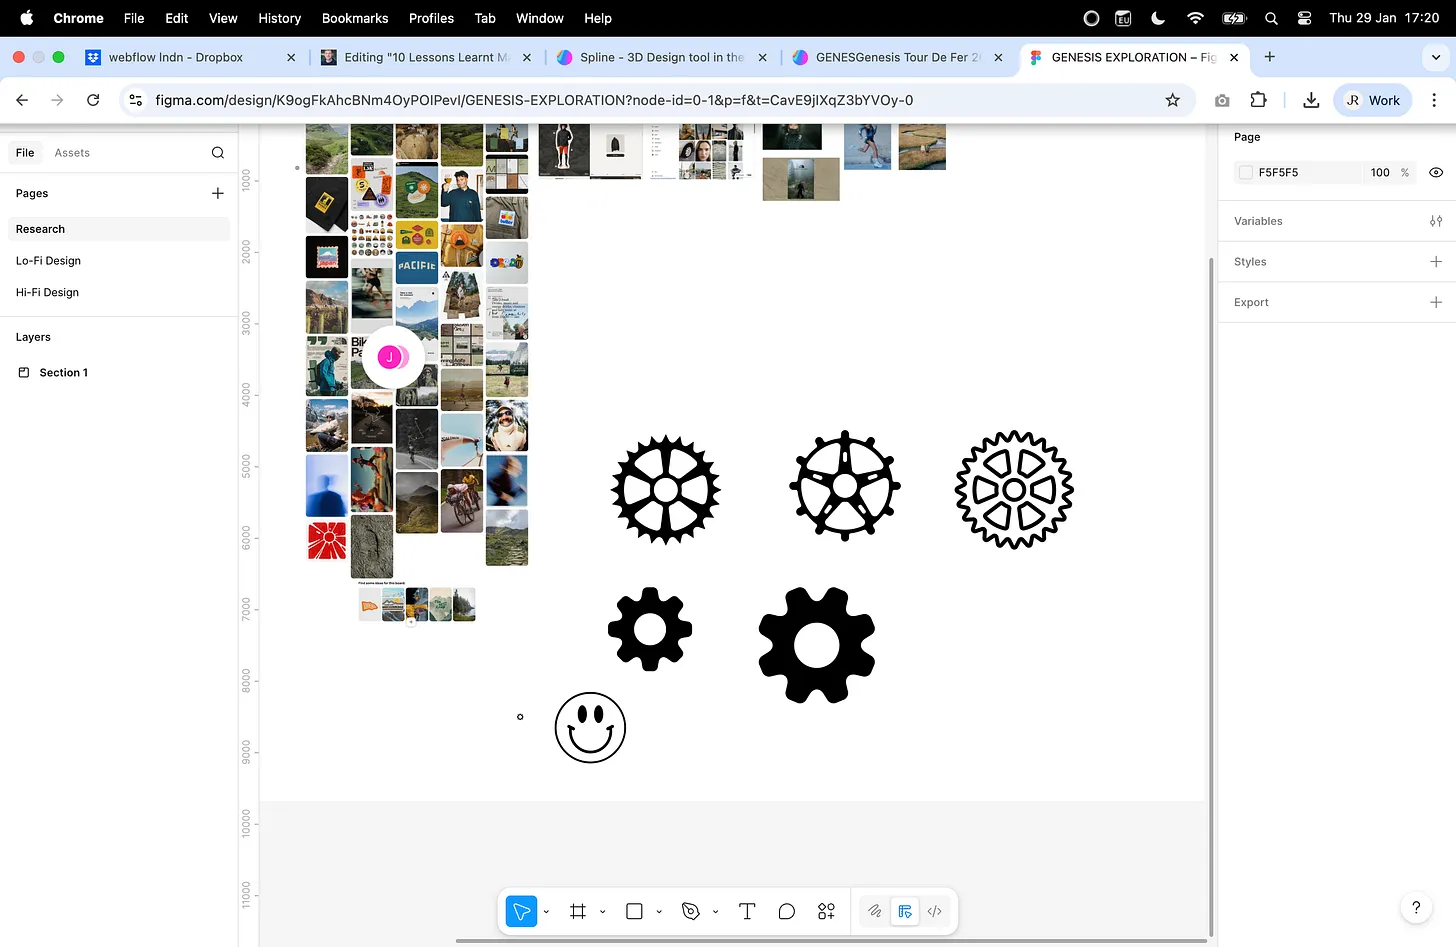
Some shapes don’t need to be modelled in 3D at all. Flat, graphic elements are often faster and cleaner to design in Figma, export as SVGs, and then extrude.
This was especially useful for icons and symbols. I’d often pull assets from places like Noun Project, clean them up in Figma, and then extrude them. The result was more precise than freehand modelling and kept visual language consistent across the project.
4. Use the Clone Tool, Not Duplicates

Clones changed how I approached repetition. Instead of copying objects and managing them individually, cloning allowed me to treat repeated elements as a single system.
If something needed adjusting — spacing, proportion, detail — I could change it once and see the update everywhere. This kept the model coherent and avoided subtle inconsistencies that are hard to spot but easy to feel.
5. Keep Textures Light and Physically Believable

Early on, I realised that adding more texture wasn’t improving realism — it was doing the opposite. Heavy noise, strong patterns, and exaggerated detail distracted from form and lighting.
I focused instead on subtle, physically believable textures that support the shape rather than dominate it. I’ve broken this down in much more detail in this article:
https://www.jackredley.design/articles/how-to-achieve-realistic-3d-textures-in-spline
The key takeaway is restraint. Most materials look better when you do less.
6. Save Colours for Re-use

Manually picking colours every time introduces inconsistency almost immediately. Saving colours as reusable assets meant I could maintain a controlled palette and adjust it later without hunting through the scene.
This also helped reinforce hierarchy — certain colours belonged to certain types of elements, which made the model easier to read visually.
7. Smooth and Edit Instead of Rebuilding
When something didn’t feel right, my instinct used to be to start over. In this project, I learned to pause and refine instead. Smoothing edges, adjusting points, and editing existing geometry often produced better results with far less effort.
This approach keeps momentum going and avoids unnecessary complexity.
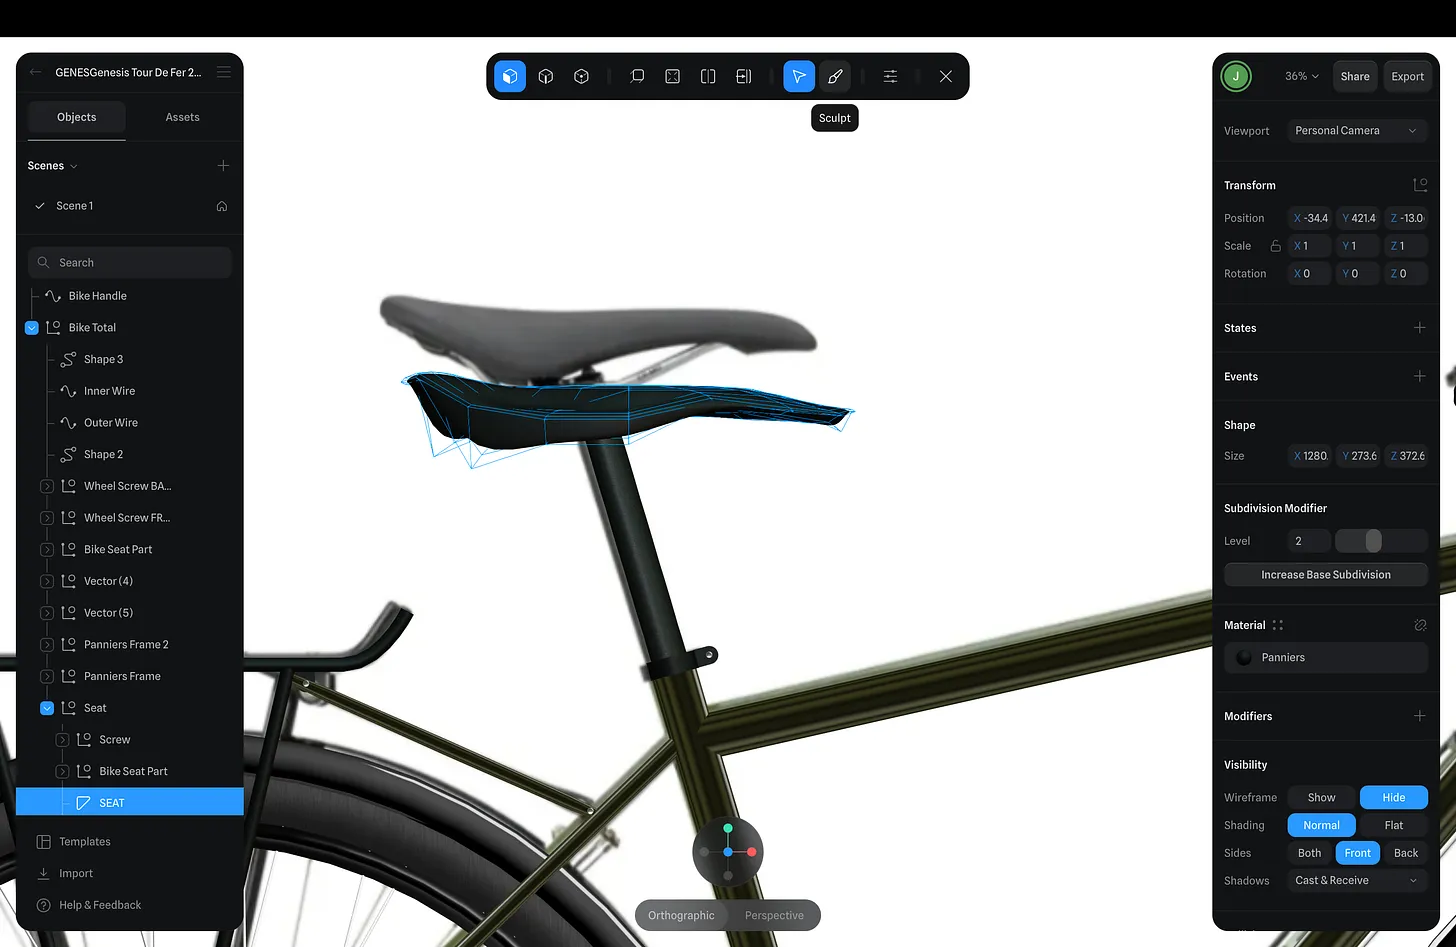
8. Use Sculpt Tools for Genuinely Complex Shapes

Some forms don’t respond well to rigid modelling techniques. When shapes became awkward or overly constrained, sculpt tools allowed me to approach them more intuitively.
Rather than fighting geometry, sculpting let me focus on silhouette and flow — which mattered far more than perfect topology at this stage.
9. Use a Helix to Create Screws
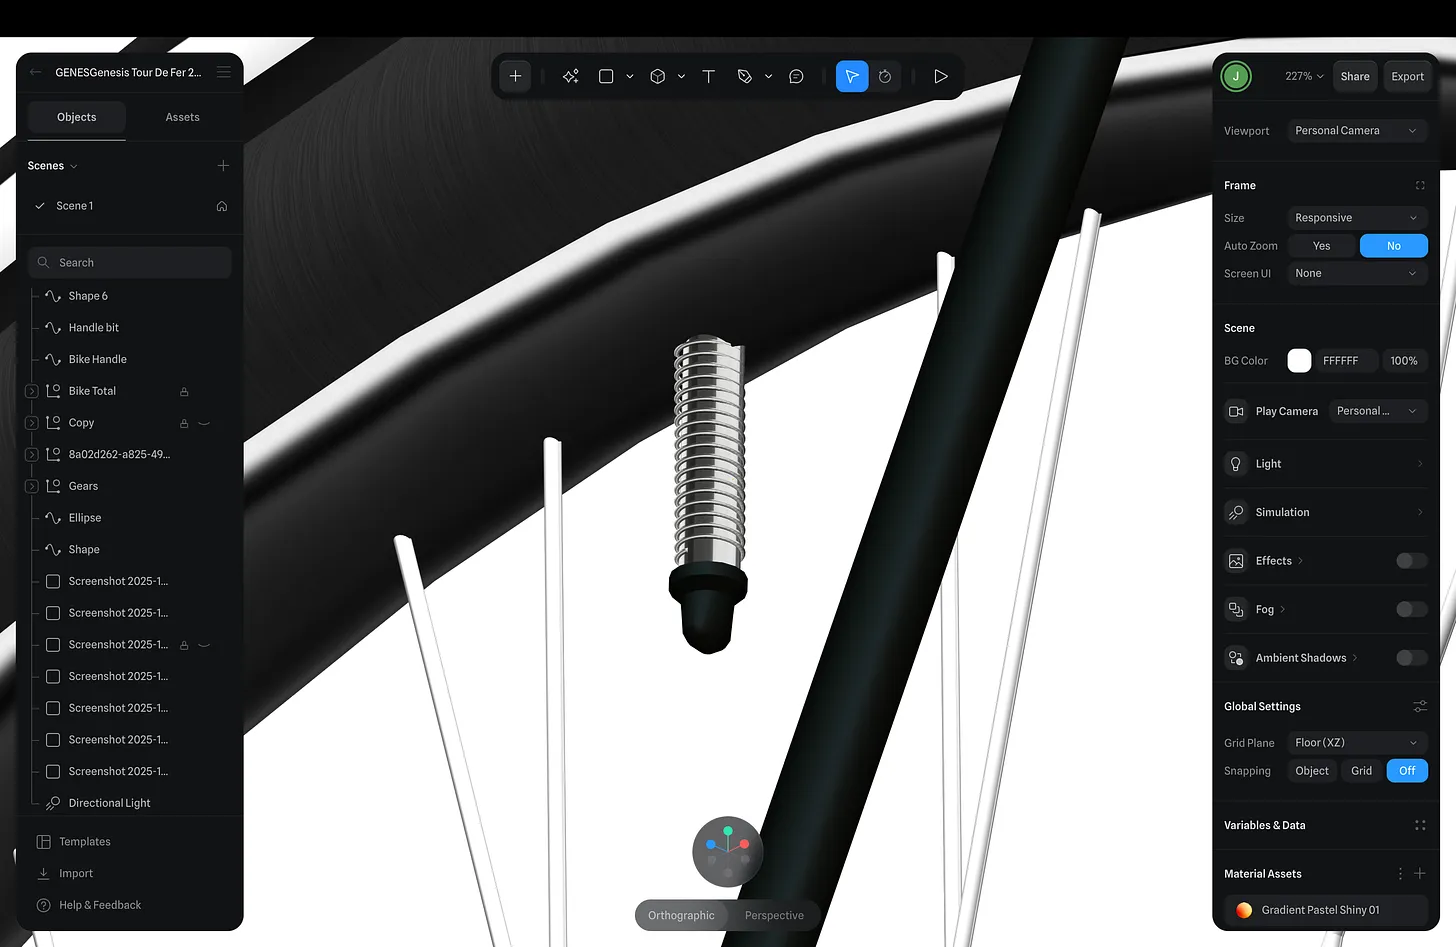
Threads are a classic time sink if you approach them naïvely. Using a helix as the foundation for screws produced clean, accurate results quickly and made the components easy to reuse elsewhere.
It’s a small technique, but it removes an entire category of friction.
10. Use the Pen Tool to Actively Shape Geometry
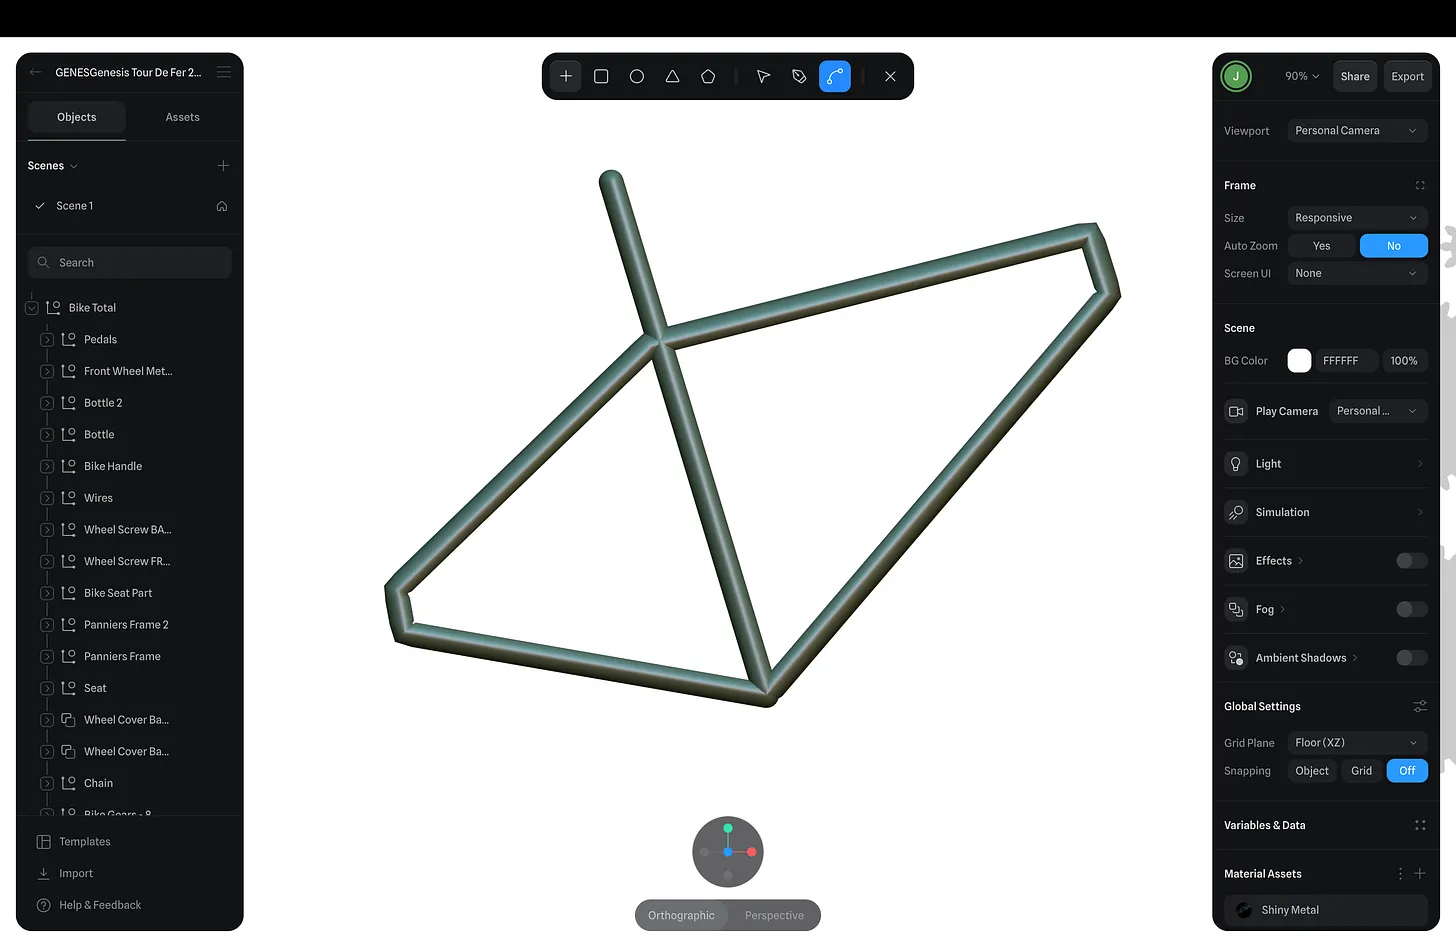
The Pen Tool became one of my most-used tools for refinement. Instead of treating shapes as static, I used it to actively push and pull geometry into better proportions.
This made it easier to iterate without restarting and encouraged a more exploratory workflow.
Closing Thoughts
What this project taught me is that complexity doesn’t come from advanced tools — it comes from accumulation. Small decisions compound quickly, either into clarity or confusion.
Many of these lessons also apply directly to how I think about 3D on the web. I explore that crossover in more detail here:
https://www.jackredley.design/articles/building-3d-web-experiences-drag-to-unlock-magic-with-webflow-spline
If you can keep your process intentional, even complex projects remain approachable. That, more than anything, is what makes building in 3D sustainable.
%20(1).jpg)